Sunday, February 27, 2011

Junkerific Thrifty Finds

So, I have decided to re-design the girls' room into something fabulous. The look I'm going for is sort of modern, trendy, shabby chic with a vintage vibe. A lot of color inspiration has been pulled from rooms like these:


(More can be seen HERE

I ventured out to a couple of my favorite thrift stores... looking for basically anything that caught my eye. In my mind, I was looking for nice vibrant colors that would stack well together, and hopefully not look like I just grabbed a bunch of random junk and stuck it in the room. (Which, to be honest, I'm not worried about.) Once I incorporate the textiles I'm sure it will flow nicely... until then, I've been scouring blogs and Etsy for inspiration that I can hopefully replicate (in a cost efficient manner, ya feel me?). As much as I'd love to go crazy at Anthroplogie, I'd rather keep the cash in our account and have a little scavenger hunt to achieve this fabulous look. Besides, then I get all the bragging rights, right?

Here's what I grabbed today!


Here's the group. 

This mirror/wall hanging was $10.

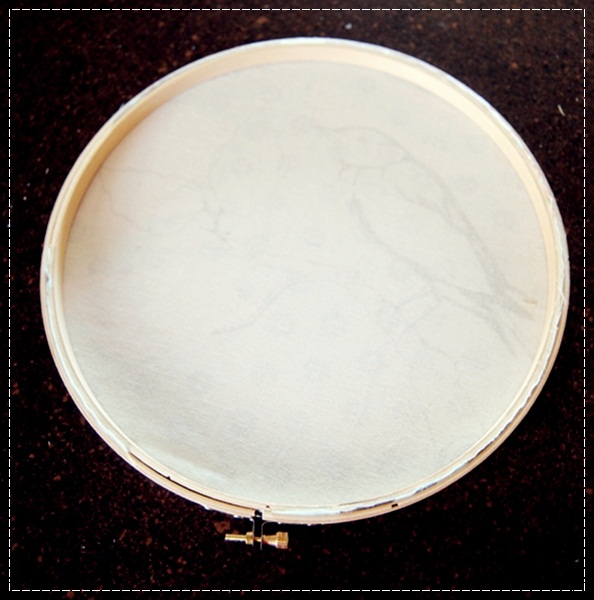
This embroidered muslin piece was $4.00. I'm going to back it with a soft minkee and have it draped over a vintage child's chair (that was actually mine when I was little... and it was vintage then! Ha!)


This bowl was $4.80 and the tray was $5.00. I loved the colors of both. 


This corner stand was $9.00. I was going to repaint it, but I kinda of liked the scuffed up look once I cleaned it. 

This is a 70's food tray. I might make it a magnet picture board. Was only $2.00

I actually had 2 matching pictures to this, so I had to buy it. I'm going to steal the 2 I had hung in the bathroom and hang them in the girls room. $8.00 (which I thought was steep considering I got the others at a yard sale for $2.00 total). 

This is a tin food tray. I don't know what I'm going to do with it, but the colors were so vibrant (even under a layer of dust) I had to get it. 


Well there you have it! I'll be sure to update as I complete projects in their room. I have a feeling it's going to be a LOT of sewing. 


Thursday, February 17, 2011

Tangled Party Dress

We're back from vacation, which means it's back to work!

I have several orders that came in over the weekend, and I'm working on them in the order they were placed! It's been great! :)

Today, I finished a custom dress and bow for a friend's daughter. Her birthday theme is "Tangled," so of course she needed a party dress!

I ordered the bow center from HERE. 

It turned out so cute!


Tuesday, February 8, 2011

Canvas Stretching Tutorial

Well good morning!

I thought I'd squeeze one more tutorial on to the blog before we head out to good ol' Las Vegas, NV for the weekend! 

I try to give unique, personalized, well thought out, and hopefully handmade gifts for Christmas. I like to give something that I know for a fact that person doesn't already have. This year, I decided to get photo canvases made of pictures I had taken. I used THIS site to have them made. This particular canvas measures 12" X 18". 


1. You will need 4 canvas stretchers, each measuring 2 inches shorter than the canvas. For my canvas, my stretchers measured 10" and 16". You will also need the canvas and staple gun. I had to use my husband's because I couldn't find my girly one. :( It was a little harder because it requires more muscle.


 2. Close up of how the interlocking stretchers look. You can get these at most craft stores with a canvas section. 

Close up of the canvas.

3. Slide each adjoining stretcher into it's corresponding slot. This takes a little muscle. I felt like a dude during most of this project.

This is how it will look once it's in place. Do this to all ends. 

4. You may need to use a rubber mallet to make sure it's all as even as possible. You can check this by measuring from diagonals and checking if they are the same.

5. Lay the stretcher on the back of the canvas.


6. Stretch the canvas and staple one staple on each end.

7. One each side, staple two staples on each side of the first one. Continue to do this in a circle until you reach the corners. 

8. Once you reach the corner, fold it like a hospital corner and staple it. 

It should look like this.

8. You can hammer down and staples that stick out slightly. This wasn't my best canvas due to the heavy duty stapler. I wasn't able to get as close of a staple. 

9. Staple a string, wire or ribbon to the back to hang it.

This is how it should look. 


 11. Hang and admire your work. You might feel like a totally awesome carpenter. Like Jesus or something. Bask in that for a moment. 

Sunday, February 6, 2011

Embroidery Hoop Art Tutorial

This super cute project can add a splash of color to any space needing it. In my case, it was my sewing room wall. I wasn't super thrilled about what I had before:


To me, it looked messy, not really cute, just blah.
So! I looked around at other pictures of craft rooms and saw these adorable embroidery hoop wall hangings. It seemed so cute and simple and cheap! So for the cost of $4.16 for 4 embroidery hoops and some of my favorite fabrics, I got to work!


1. You will need embroidery hoops, super cute fabrics, and scissors.

2. First, lay the hoop on top of the fabric, cut off a swatch to use.

In my case, I lucked out with this print (that I've been dying to use for something!) and was able to capture a perfect circle. (Well, almost perfect.)


3. Lay your fabric right side up above the non-adjusting ring.

4. Gently put the adjustable ring on top of the fabric. 


5. Flip it over and gently stretch the fabric between the rings. 

6. Once you reached your desired stretch, trim the excess fabric.

7. Admire your adorable work. 


8. Repeat steps 1-7 for the remaining rings. 


9. Hang them up! 

I think it really adds to the wall space, making it look  more chic!

Juniors to Youth Shorts Re-fashion Tutorial

I love tutorials. Absolutely love them. In fact, there's a site, www.youcanmakethis.com, that women actually sell patterns and tutorials of things they make. It is AWESOME.

I've always wanted to make one, so when I stumbled across a pair of size 11 juniors shorts for a BUCK at walmart, I had to come up with SOMETHING to make out of them. I tried them on, but they're a junior cut, so they were super short and wayyy too wide. So, instead of trying to whip something up for me, I thought making them into size 7/8 youth for my stepdaughter would be great! For a dollar, what could I lose, right?

Well, it was actually incredibly easy. It took me about 20 minutes start to finish. I can't wait to try them on her and see how they fit! I also bought a jump suit for $1, cut the inseam out, finished the edges and it's now one of my favorite shirts! :)


So here we go!

1. Buy giant shorts to make into tiny shorts. Check!

2. Lay small shorts on top of the large shorts. Line up the center (inseam) seams.


3. Hopefully you'll luck out like I did, and be able to cut the pocket out completely (shew!).

4. Open shorts, long ways.
5. Now, we'll insert the elastic the new back casing we created when we cut the shorts on the side seams. If you don't have this option, another idea would be to sew the elastic (stretched) to the inside of the back top. I used 8" of elastic for 7/8 shorts. You may need to measure your model to make sure the correct amount of elastic is used. Or you could be lazy like me and just eyeball the orignal 7/8 shorts. :)
6. Pin elastic at ends, the sew shut 1/2 from the edge on either side.
7. Pin shorts down side seams (right sides facing each other). Then sew shut with 1/2 inch seam allowance.
8. Finish ends with zig-zag stitch or serger. :)
9. Viola!! :)

Saturday, February 5, 2011

What I've been working on!

In between orders, I like to keep myself busy making stuff for me or the kids... this time, it was my turn!

Brian gave me 2 button up shirts that were now too small for him, (if he gets any bigger I don't know where we're going to buy him clothes. Maybe I will need to tap into the gigantor mens industry and try my hand at making him some shirts. Maybe.)

Anyway, I've been wanting to try to make a dress out of a button up shirt, sort of how I made Lily a dress out of one here:


For Lily's dress I used a tutorial you can find HERE.

Being that Brian wears a XL, I had plenty of fabric to play with. I began by draping the front and back of the fabrics on my dress form. Once I got the general shape I was looking for, I decided it would be better for a form fit if I sewed the button seams shut. After that, I began draping and pinning the bodice of the dress using one of the long sleeves for material. The important thing to remember when draping is that everything is symmetrical... which takes time. So stick a guilty pleasure reality show on and be patient... in the end you should be able to sew all the darts flat once they are pressed. 

I doubt that made a whole lot of sense, I will definitely need to make a tutorial on this dress, it turned out so cute! And at the rate my husband outgrows his shirts, I could have an entire spring line by the end of winter! :) 

Here's a picture! 


Friday, February 4, 2011

Valentine's Wedding Outfits

This was a custom order made for a friend who will be attending a Valentine's themed wedding. She wanted a matching set for her 4 children, and they turned out great!!!

Hello!

Hello, and welcome to my new blog!

I decided to create a blog instead of a website to hold all the information and possibilities available through my store as well as post fun and interesting tutorials, concepts, completed projects and more! The blog interface offers so many more opportunities than I could have used with my business page, and I really look forward to keeping my friends, customers and new blog followers up to do date on all the happenings within my world of sewing and creating.

I hope you enjoy my posts and accessibility as I post updates on orders and hopefully some new ideas!